


10 Essential BBQ Tips Every Beginner Needs to Know

Master the fundamentals of outdoor cooking and start grilling like a pro from day one.
Starting your BBQ journey can feel overwhelming. There are so many grill types, techniques, tools, and opinions out there that it is easy to feel lost before you even light your first fire. But here is the truth: great BBQ is not about expensive equipment or secret recipes — it is about understanding a few fundamental principles and practicing them consistently.
Whether you just bought your first grill or you have been cooking outdoors for a while but want to improve your results, these ten essential tips will help you avoid the most common mistakes and start producing delicious, perfectly cooked food right away.
Tip 1: Always Preheat Your Grill
This is the single most common mistake beginners make. Putting food on a cold grill leads to sticking, uneven cooking, and poor sear marks. Just like you would not put a steak in a cold frying pan, you should never put food on a cold grill.
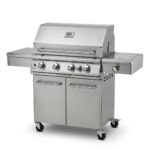
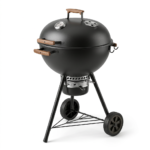
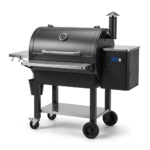
For gas grills, preheat with the lid closed on high for 10 to 15 minutes. For charcoal grills, wait until the coals are covered with a layer of white-gray ash — this usually takes 20 to 30 minutes after lighting. For pellet grills, allow 15 to 20 minutes to reach your set temperature.
A properly preheated grill gives you better sear marks, more even cooking, and makes it much easier to release food from the grates without tearing.
Tip 2: Set Up Two Heat Zones
One of the most important techniques in grilling is creating two heat zones — a hot zone for direct cooking (searing) and a cooler zone for indirect cooking (gentle, slower cooking). This gives you complete control over your cook and prevents the all-too-common problem of food that is burnt on the outside and raw on the inside.
On a gas grill, simply turn one or two burners to high and leave the others on low or off. On a charcoal grill, push all the hot coals to one side of the grill, leaving the other side empty. On a pellet grill, the fan-driven convection system naturally creates an even cooking environment, but you can still use the upper rack as a cooler zone.
Use the direct zone to sear steaks, burgers, and chops, then move them to the indirect zone to finish cooking through without burning. This technique is called the reverse sear when you start on the indirect side and finish with a sear — and it produces incredible results.
Tip 3: Stop Pressing Your Burgers
We have all seen it — someone at a cookout pressing down on burger patties with a spatula, watching the juices sizzle and flare up. It might look satisfying, but it is one of the worst things you can do to a burger.
When you press a burger, you are squeezing out the juices that keep it moist and flavorful. Those juices dripping onto the coals or burners cause flare-ups that can char the exterior of the burger before the inside is cooked. The result is a dry, hockey-puck burger with a burnt exterior.
Instead, place your patties on the grill and leave them alone. Flip them once, about halfway through the cook, and resist the urge to press. Your burgers will be juicier, more flavorful, and have a much better texture.
Tip 4: Use a Meat Thermometer
Guessing doneness by look, feel, or cooking time is unreliable and leads to overcooked or undercooked food. A good instant-read meat thermometer is the most important tool in your grilling arsenal — more important than any fancy grill gadget.
Here are the target internal temperatures for the most common grilled foods:
| Food | Target Internal Temperature |
| Chicken (breasts, thighs, wings) | 165°F (74°C) |
| Steak (medium-rare) | 130–135°F (54–57°C) |
| Steak (medium) | 140–145°F (60–63°C) |
| Burgers (ground beef) | 160°F (71°C) |
| Pork chops | 145°F (63°C) |
| Pork shoulder (pulled pork) | 195–205°F (90–96°C) |
| Brisket | 195–205°F (90–96°C) |
| Fish (salmon, etc.) | 145°F (63°C) |
| Sausages | 160°F (71°C) |
Insert the thermometer into the thickest part of the meat, avoiding bones and fat pockets. Remember that meat continues to cook for a few degrees after you remove it from the grill — this is called carryover cooking — so it is often best to pull food off the heat about 5 degrees below your target.
Tip 5: Let Your Meat Rest
This tip is simple but makes an enormous difference. When you remove meat from the grill, the juices inside are agitated and concentrated near the surface. If you cut into it immediately, those juices pour out onto the cutting board, leaving you with dry meat.
By letting the meat rest for 5 to 10 minutes (or up to 20 minutes for large cuts like brisket and pork shoulder), the juices redistribute throughout the meat, resulting in a much more moist and flavorful eating experience.
Tent the meat loosely with aluminum foil to keep it warm during the rest. Do not wrap it tightly, as this can steam the crust you worked hard to create.
Tip 6: Keep the Lid Closed
Every time you open the grill lid, you lose heat and smoke. On a gas grill, this means the temperature drops and your food takes longer to cook. On a charcoal or pellet grill, opening the lid lets out precious smoke that is flavoring your food.
The old saying among pitmasters is: “If you’re looking, you’re not cooking.” Trust your thermometer and your timer. Only open the lid when you need to flip, rotate, or check the temperature of your food.
This is especially important for low-and-slow smoking. Every lid opening can add 10 to 15 minutes to your total cook time and disrupt the delicate smoke environment inside the cooking chamber.
Tip 7: Oil the Grates, Not the Food
Many beginners brush oil directly onto their food before grilling, thinking it will prevent sticking. While this can help, a more effective approach is to oil the grill grates instead.
After preheating and brushing your grates clean, fold a paper towel into a small pad, grip it with long tongs, dip it in a high-heat cooking oil (like canola or vegetable oil), and wipe it across the hot grates. This creates a thin, non-stick layer that helps food release cleanly.
Oiling the grates rather than the food also reduces flare-ups, since excess oil on the surface of the food drips down onto the heat source and ignites.
Tip 8: Do Not Overcrowd the Grill
It is tempting to load up every square inch of grill space when you are cooking for a crowd, but overcrowding is a recipe for uneven cooking. When food is packed too tightly, it traps steam between the pieces, which prevents proper browning and searing.
Leave at least half an inch to an inch of space between each item on the grill. This allows hot air and smoke to circulate freely around each piece, ensuring even cooking and proper caramelization.
If you are cooking for a large group, it is better to cook in batches. Keep the first batch warm in a low oven (around 200°F) while you grill the second batch.
Tip 9: Season Generously and Early
One of the biggest differences between restaurant-quality grilled food and mediocre backyard BBQ is seasoning. Many beginners under-season their food, either because they are afraid of using too much salt or because they season right before grilling.
For the best flavor, season your meat generously with salt at least 40 minutes before grilling — or even the night before. This process, called dry brining, allows the salt to penetrate deep into the meat, enhancing flavor and improving moisture retention.
For thicker cuts like steaks, chops, and chicken pieces, you can be quite liberal with salt and pepper. A good rule of thumb is about half a teaspoon of kosher salt per pound of meat. Add other seasonings and rubs just before grilling to prevent them from burning.
Tip 10: Invest in the Right Tools
You do not need a garage full of gadgets, but a few quality tools will make your grilling experience safer, easier, and more enjoyable. Here are the essentials every griller should have:
•Instant-read thermometer — the most important tool for perfectly cooked food
•Long-handled tongs — for flipping and moving food safely
•Stiff grill brush — for keeping grates clean
•Chimney starter (for charcoal grills) — the fastest, easiest way to light charcoal without lighter fluid
•Heat-resistant gloves — for handling hot grates, pans, and coals
•Basting brush or mop — for applying sauces and marinades during cooking
•Grill spatula — for flipping burgers, fish, and delicate items
•Drip pans — for catching fat and preventing flare-ups during indirect cooking
These tools do not need to be expensive. A basic set of quality grilling tools will serve you well for years and make every cook more enjoyable.
Final Thoughts
Grilling is a skill that improves with practice. Do not be discouraged if your first few cooks are not perfect — every great pitmaster started as a beginner. Focus on mastering these ten fundamentals, and you will be well on your way to producing incredible BBQ that your family and friends will rave about.
Ready to put these tips into practice? Shop our selection of grills and BBQ accessories at BAQQER.com and start your grilling journey today.