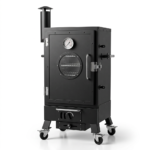



How to Smoke a Brisket: The Ultimate Step-by-Step Guide

Everything you need to know to smoke a tender, juicy, perfectly barked brisket — from selecting the right cut to slicing and serving.
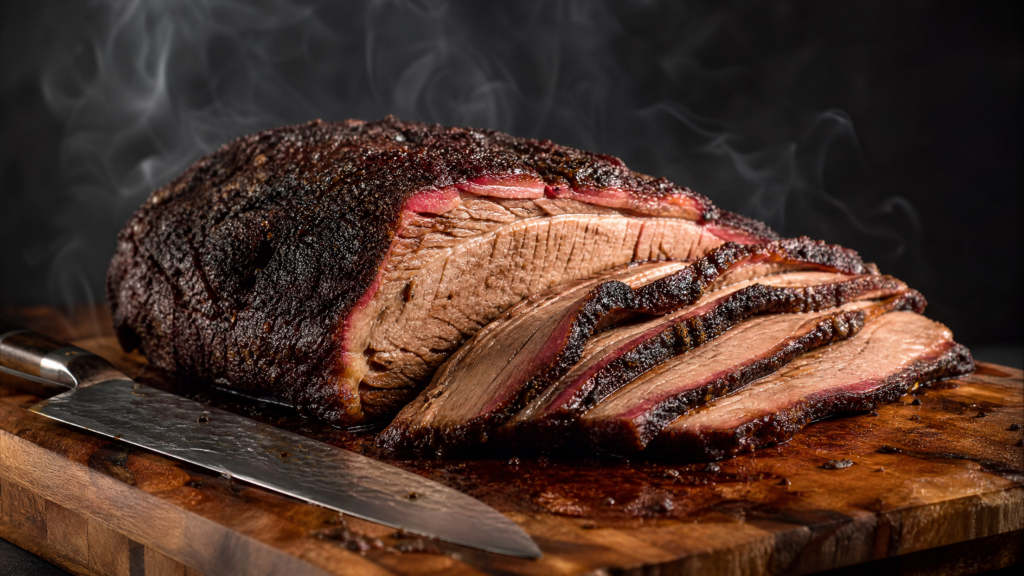
Smoked brisket is the crown jewel of American BBQ. When done right, it is a masterpiece of tender, juicy meat wrapped in a dark, flavorful bark with a beautiful smoke ring beneath the surface. When done wrong, it is a tough, dry, expensive disappointment. The difference between these two outcomes comes down to technique, patience, and understanding a few key principles.
Brisket has a reputation for being one of the most challenging cuts to smoke, and that reputation is well earned. It is a large, tough cut of beef from the lower chest of the cow, packed with connective tissue that requires long, slow cooking to break down into tender, melt-in-your-mouth goodness. But do not let that intimidate you. With the right approach, even a first-time smoker can produce a brisket that rivals the best BBQ joints in Texas.
This guide walks you through every step of the process, from choosing the right brisket at the store to slicing and serving the finished product. Let us get started.
Step 1: Choosing the Right Brisket
The quality of your finished brisket starts at the butcher counter. Here is what to look for.
Grade
Beef brisket is available in several USDA grades, and the grade you choose has a significant impact on the final result.
•Prime grade — the highest quality, with the most marbling (intramuscular fat). More marbling means more flavor, more moisture, and a more forgiving cook. If your budget allows, always choose Prime.
•Choice grade — the most widely available grade and a solid middle ground. Look for a Choice brisket with good marbling and a thick, even flat.
•Select grade — the leanest and least expensive option. Select briskets are more prone to drying out during the long cook and are generally not recommended for smoking.
Size
A whole packer brisket (which includes both the flat and the point) typically weighs between 12 and 18 pounds. For most home smokers, a 12 to 14-pound brisket is ideal — large enough to develop great bark and smoke flavor, but not so large that it takes forever to cook or does not fit on your smoker.
The Flat and the Point
A whole packer brisket consists of two muscles separated by a layer of fat. The flat is the larger, leaner muscle that makes up most of the brisket. The point (also called the deckle) is the smaller, fattier muscle that sits on top of the flat. The point is where burnt ends come from, and many pitmasters consider it the most flavorful part of the brisket.
When selecting a brisket, look for one with a thick, uniform flat — this ensures even cooking. Avoid briskets with a very thin flat, as it will overcook before the point is done.
Step 2: Trimming the Brisket
Trimming is one of the most important steps in brisket preparation, and it is where many beginners make mistakes. The goal is to remove excess hard fat and silver skin while leaving a thin, even layer of fat that will render during the cook and keep the meat moist.
Tools You Need
•A sharp boning knife or trimming knife
•A large cutting board
•Paper towels
Trimming Process
1. Start with a cold brisket. Cold fat is firmer and much easier to trim than warm, soft fat. Trim your brisket straight out of the refrigerator.
2. Trim the fat cap. The fat cap is the thick layer of hard fat on one side of the brisket. Trim it down to about a quarter inch thick. You want enough fat to baste the meat during the cook, but not so much that it prevents the rub and smoke from penetrating.
3. Remove the silver skin. On the meat side of the brisket, you will find a thin, silvery membrane called silver skin. This does not render during cooking and creates a tough, chewy barrier. Slide your knife under it and remove as much as you can.
4. Square off the edges. Trim any thin, flappy edges of meat that will dry out and burn during the long cook. You want the brisket to have a relatively uniform, aerodynamic shape so it cooks evenly.
5. Remove the hard fat chunk. Between the flat and the point, there is a large chunk of very hard fat that will never fully render. Remove as much of this as you can without separating the two muscles.
Step 3: Seasoning the Brisket
Texas-style brisket is traditionally seasoned with nothing more than coarse kosher salt and coarse black pepper — a combination known as a “Dalmatian rub.” This simple approach lets the beef and smoke flavors shine through without interference.
The Classic Texas Rub
•1/2 cup coarse kosher salt
•1/2 cup coarse black pepper (16-mesh or butcher grind)
Mix the salt and pepper together and apply a generous, even coat to all surfaces of the brisket. Do not be shy — a large brisket can handle a lot of seasoning. The rub will form the foundation of the bark during the cook.
Optional Additions
If you want to add more complexity to your rub, consider these common additions:
•Garlic powder — adds savory depth
•Onion powder — adds sweetness and umami
•Paprika — adds color and a mild, sweet pepper flavor
•Cayenne pepper — adds a subtle kick of heat
Apply the rub at least one hour before cooking, or ideally the night before. This gives the salt time to penetrate the meat through dry brining, which improves both flavor and moisture retention.
Step 4: Setting Up Your Smoker
Brisket is smoked at a low temperature for a long time. The most common target temperature is 225°F to 250°F (107°C to 121°C). Some pitmasters prefer to cook hotter — around 275°F — which reduces cook time and still produces excellent results.
Fuel and Wood Selection
The type of wood you use has a major impact on the flavor of your brisket. Here are the most popular choices:
•Post oak — the traditional Texas choice. Mild, clean smoke that complements beef without overpowering it.
•Hickory — a stronger, more assertive smoke flavor. Great for those who like a bold smoky taste.
•Oak — a versatile, medium-strength smoke that works well with brisket.
•Pecan — a slightly sweet, nutty smoke that adds complexity.
Avoid softwoods like pine, fir, and cedar, which produce bitter, resinous smoke that will ruin your brisket.
Smoker Setup by Type
Offset smoker: Build a fire in the firebox using your preferred wood. Maintain a clean, thin blue smoke — thick white smoke produces bitter flavors. Add wood splits every 45 minutes to an hour to maintain temperature.
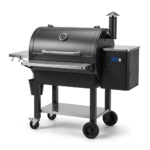
Pellet smoker: Fill the hopper with your chosen pellets, set the temperature to 225°F or 250°F, and let the smoker preheat for 15 to 20 minutes. Pellet smokers are the easiest option for beginners because they maintain temperature automatically.
Kamado (ceramic) smoker: Fill the firebox with lump charcoal and add a few chunks of smoking wood. Light the charcoal, adjust the vents to stabilize at your target temperature, and let the smoker come up to temp before adding the brisket.
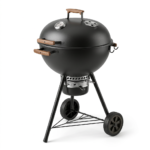
Charcoal kettle grill: Set up for indirect cooking using the snake method or a slow-and-sear insert. Add wood chunks on top of the coals for smoke.
Step 5: The Cook
Place the brisket on the smoker with the fat side facing the heat source (fat side up on most pellet and offset smokers, fat side down on some kamado cookers where the heat comes from below). Insert a leave-in meat thermometer probe into the thickest part of the flat.
The Stall
Somewhere between 150°F and 170°F internal temperature, your brisket will hit what is known as “the stall” — a frustrating plateau where the internal temperature stops rising for several hours. This happens because moisture evaporating from the surface of the meat cools it at the same rate the smoker is heating it.
Do not panic. The stall is completely normal. You have two options:
Option 1: Push through it. Simply wait. The stall will eventually break, and the temperature will start climbing again. This can take anywhere from 2 to 6 hours, depending on the size of the brisket and the humidity inside your smoker.
Option 2: Wrap it (the Texas Crutch). Once the brisket reaches about 165°F and has developed a dark, firm bark, wrap it tightly in butcher paper or aluminum foil. This traps moisture and heat, powering through the stall much faster. Butcher paper is preferred by most pitmasters because it allows some airflow, preserving the bark better than foil.
When Is It Done?
Brisket is done when it reaches an internal temperature of 195°F to 205°F in the thickest part of the flat — but temperature alone is not the best indicator. The real test is probe tenderness. Insert your thermometer probe or a skewer into the flat. It should slide in with almost no resistance, like pushing into a stick of soft butter.
Step 6: The Rest
Resting is arguably the most critical step in the entire brisket process. After removing the brisket from the smoker, let it rest for a minimum of one hour, and ideally two to four hours.
During the rest, the muscle fibers relax and reabsorb the juices that were driven to the surface during cooking. Cutting into a brisket too early releases all those juices onto the cutting board, leaving you with dry meat despite hours of careful cooking.
To rest your brisket, wrap it in butcher paper (if it is not already wrapped), then wrap it in a towel and place it in a dry cooler (no ice). The insulation of the cooler keeps the brisket at a safe temperature while allowing it to rest properly.
Step 7: Slicing and Serving
When it is finally time to slice, use a long, sharp slicing knife and cut against the grain. The grain of the flat and the point run in different directions, so pay attention and adjust your slicing angle accordingly.
Slice the flat into pencil-thick slices (about a quarter inch). Each slice should hold together but pull apart easily. The point can be sliced thicker or cubed for burnt ends.
Serve your brisket with classic sides like coleslaw, potato salad, pickles, white bread, and your favorite BBQ sauce on the side. In Texas, sauce is often considered optional — a well-smoked brisket should be flavorful enough to stand on its own.
Brisket Timeline Summary
| Stage | Time |
| Trimming and seasoning | 30–45 minutes |
| Smoker preheat | 15–30 minutes |
| Smoking (unwrapped) | 4–6 hours |
| Smoking (wrapped) | 3–5 hours |
| Resting | 1–4 hours |
| Total | 9–16 hours |
Final Thoughts
Smoking a brisket is a commitment of time and attention, but the reward is one of the most satisfying culinary achievements in all of BBQ. Do not be discouraged if your first brisket is not perfect — every cook teaches you something new, and even an imperfect brisket is still pretty delicious.
Ready to start your brisket journey? Shop our selection of smokers, pellet grills, and kamado cookers at BAQQER.com — we have the equipment you need to produce competition-quality brisket in your own backyard.